1. 3-Color Landing Tray for Paper and Pens
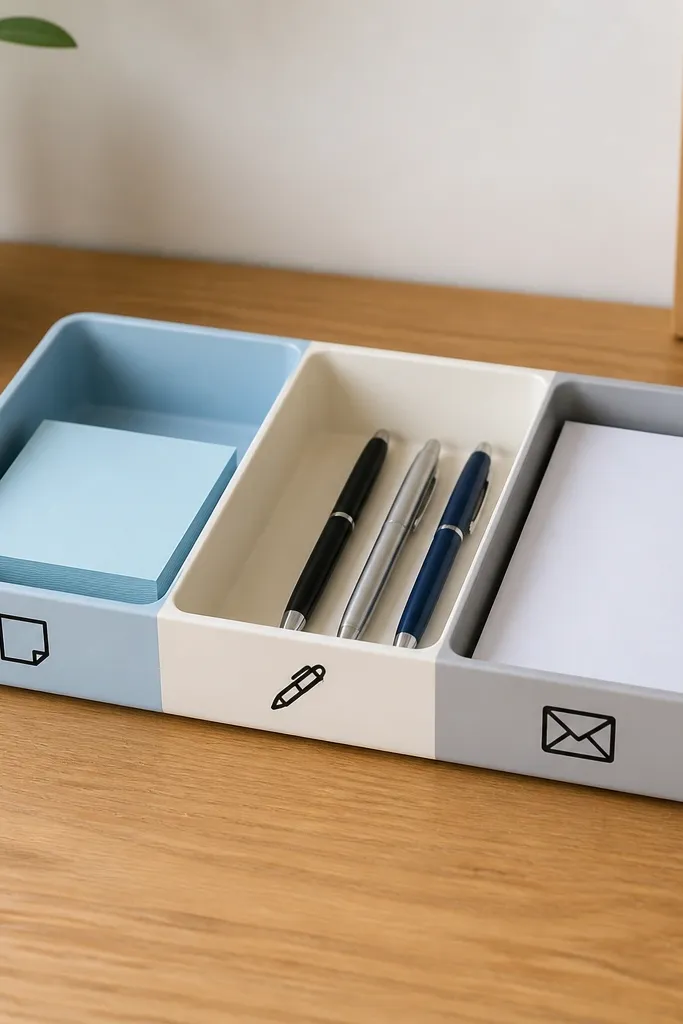
This is the fastest "best vs worth it desk organization" win because it gives your desk a single front-of-desk home. The three compartments map to how you grab items: quick writing tools, quick notes, and incoming paper. Using matching colors makes the desk look planned even when it's busy. I like cream + one calm color + one neutral because it stays clean-looking with kids around.
Build it from a store-bought desk organizer tray or DIY with a foam board base cut to 12x8 inches. Add two dividers at 3.5-inch widths so each zone fits a standard notepad and a pen cup. Cover with self-adhesive vinyl in cream, then paint or wrap dividers sky-blue and gray. Keep labels 1 inch high using a black marker and icon stickers.
Pro tipPut the tray exactly where your hand lands when you sit down. If it's one foot to the side, you'll skip it.
AvoidAvoid using open piles inside the tray - they look messy in photos and spill when kids bump the desk.
2. Non-Slip Shelf Liner Under Every Container
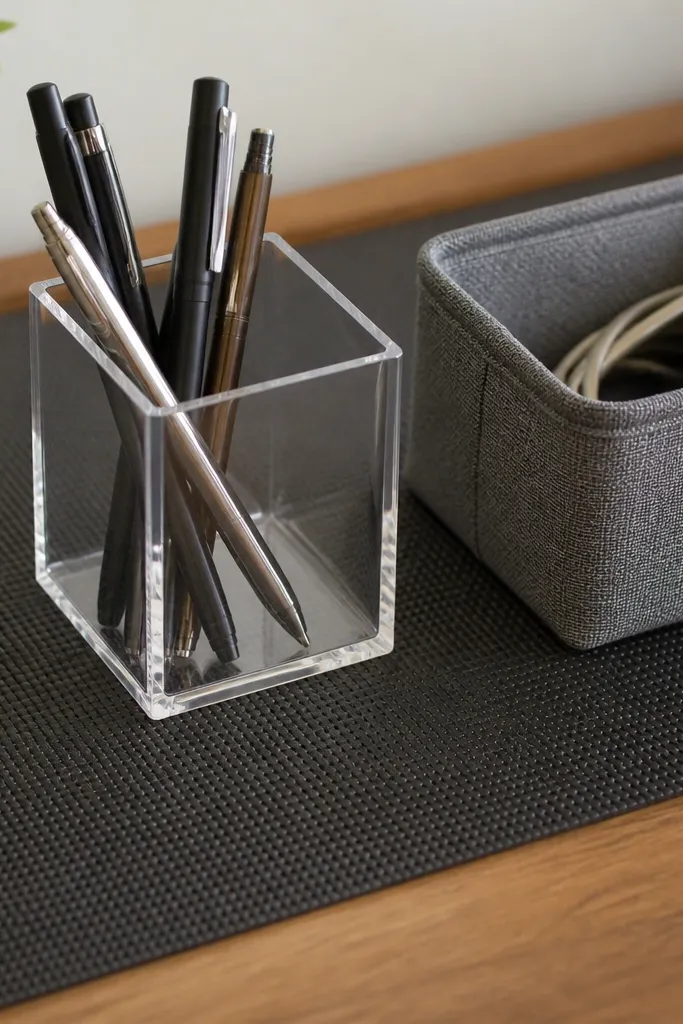
This one is worth it because it fixes a real problem: containers slide, then everything ends up in the wrong place. Non-slip liner creates friction so even lightweight bins stay put. It also makes the setup look intentional because the base is clean and consistent. I use it under clear acrylic, metal, and fabric - it's the invisible layer that keeps the desk calm.
Cut liner to match each container footprint plus a thin border (about 1/4 inch). If your desk is laminate, wipe it with rubbing alcohol first so the liner doesn't lift. For a kids desk, use a thicker liner so it doesn't curl at corners. Place the pen cup and the paper bin on top, then press edges firmly.
Pro tipIf you hate mess, choose liner with a fine texture. It doesn't show dust as easily as glossy patterns.
AvoidSkip smooth felt pads - they shift when the desk gets bumped.
3. Cord Slack Loop + Velcro Tie Wall Hook
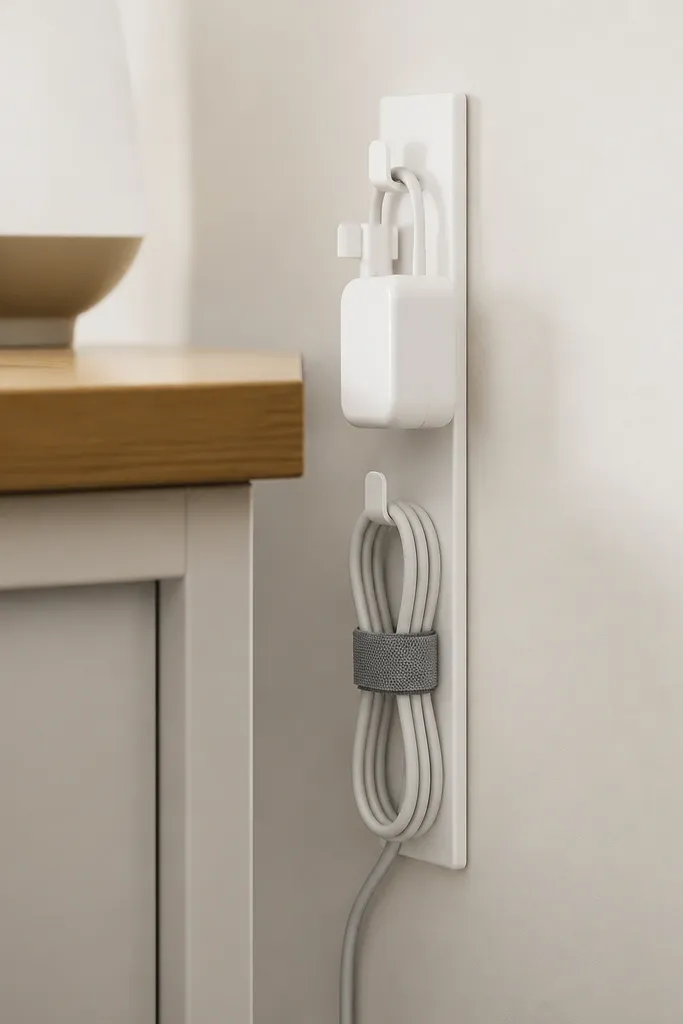
Cables are the desk's biggest visual mess, and this setup makes them look controlled. The slack loop keeps cords from pulling tight when a chair moves or a kid tugs a tablet charger. Velcro ties are fast to open and close, so you actually redo them instead of leaving them half-wrapped. It also makes the desk safer because cords stop becoming toy strings.
Screw a small strip or use a command strip hook (only if your wall holds it) 6-8 inches to the side of the desk. Create a slack loop with the adapter cable, leaving about 2-3 inches of extra slack. Wrap the loop with a 1-inch wide Velcro strap and hook the strap end to the Velcro patch. Route the cable behind the desk using a peel-and-stick cable clip.
Pro tipLabel each cord tie with a tiny piece of colored tape so kids can match chargers correctly.
AvoidDon't wrap cords tightly around the charger body - it strains the plug and makes the desk look tangled.
4. Thrifted Frame Paper Catch with Clear Sheet Protector
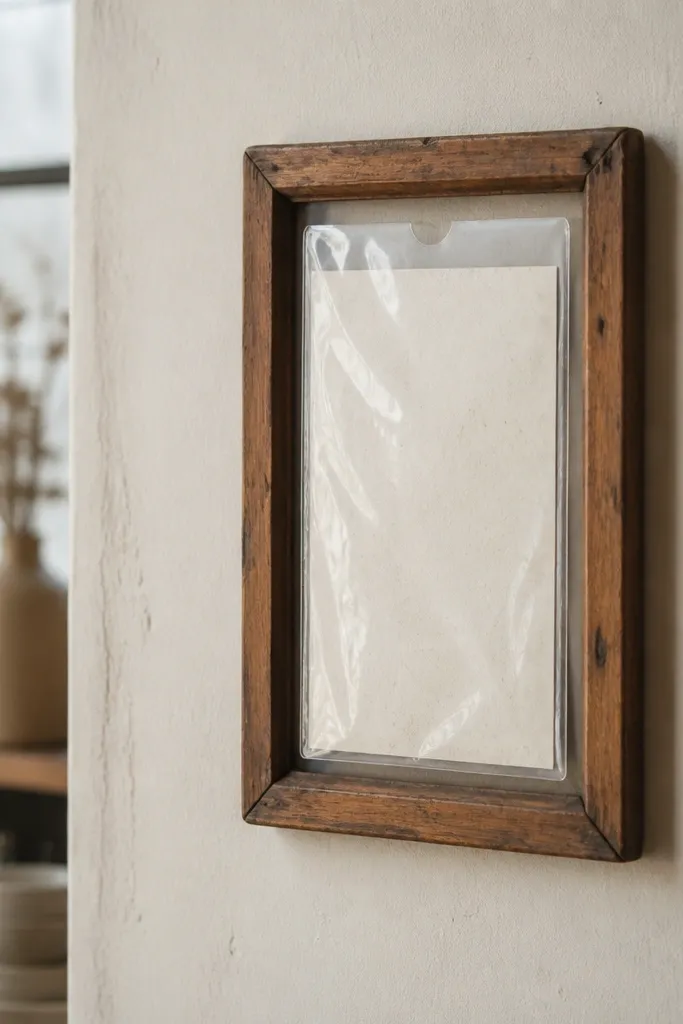
This is worth it if you hate paper clutter but don't want a full filing system. The frame makes the paper catch look like decor, and the clear protector stops pages from getting crumpled by kids. It's also easy for adults: you slide incoming stuff behind the plastic. The desk stays clean because papers don't land in random stacks.
Use a frame around 10x12 inches. Remove the backing and mount a clear sheet protector with a few small staples or clips. For extra stability, tape the sheet edges to the frame backing so it doesn't bow. Mount it at eye level so you can drop papers in without hunting.
Pro tipPut one icon label at the bottom like a simple arrow and a paper symbol for 'Inbox'.
AvoidSkip frames without a backing support; thin plastic will sag and pages will bunch.
5. Drawer Insert Organizer Made from Flat Wooden Dowel Slats
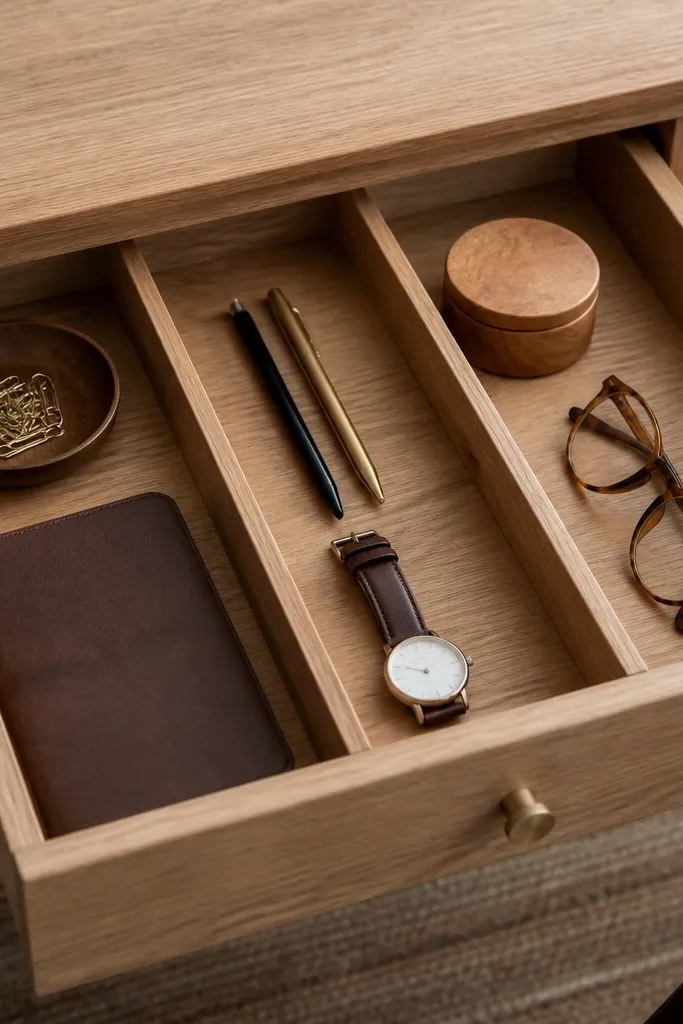
This is the best vs worth it desk organization move when you need hidden order. Drawer inserts stop the 'everything mixed' problem that makes drawers look chaotic. Wood slats also look warm and not toy-like, which matters on a kids desk where you're constantly seeing it. The compartments let you store small items - markers, tape, scissors handles - without digging.
Measure your drawer interior first, then cut slats to the width you want: I like 2.5-inch compartments for kids supplies. Use 1/4-inch dowel or thin wood strips, then glue them to a plywood base cut to drawer size. Sand edges smooth and apply matte clear coat so it wipes clean. If you don't want glue, use double-sided foam tape under the slats.
Pro tipAdd a label strip on the drawer front with big icons like scissors, tape, markers.
AvoidAvoid glossy finishes - they show scratches and finger smudges fast.
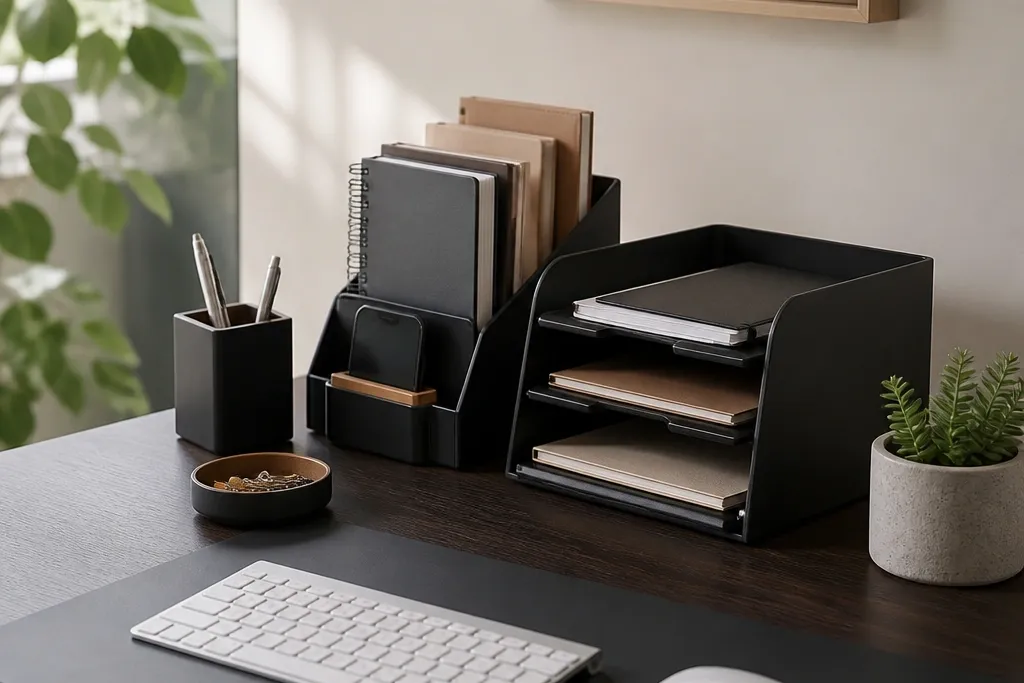
6. Magazine Holder for Rulers and Notebooks
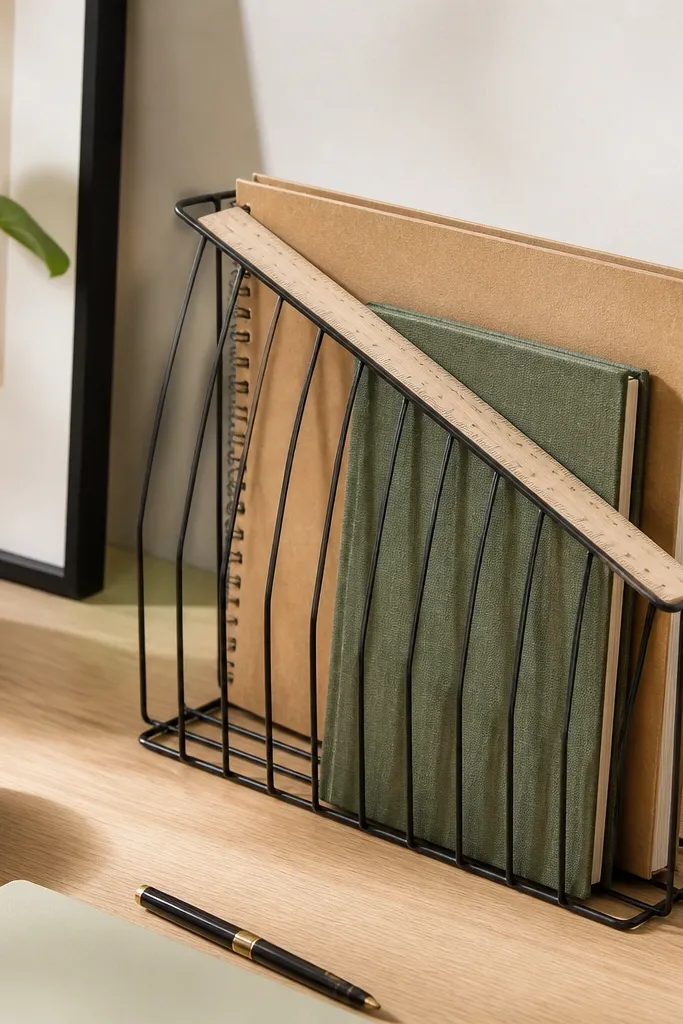
Wire holders are cheap, sturdy, and they keep tall items visible. That matters because kids grab what they can see - if notebooks disappear, they end up stacked on the floor. This setup keeps rulers, sketch pads, and assignment notebooks in one vertical place. It also looks tidy because everything is upright and aligned.
Choose a holder that's 6-8 inches wide and tall enough for a standard composition notebook. Place it on the side opposite the keyboard so the desk looks balanced. For diagonal rulers, use a small foam wedge under the ruler so it doesn't slide. Keep one notebook for 'today' and one for 'next week' so you're not constantly moving stacks.
Pro tipUse a ribbon bookmark or a strip of washi tape to mark the 'today' notebook page so it stays ready.
AvoidSkip holders with wide gaps - small items fall through and the desk looks scattered.
7. Pegboard Desk Back Organizer with Color-Coded Hooks
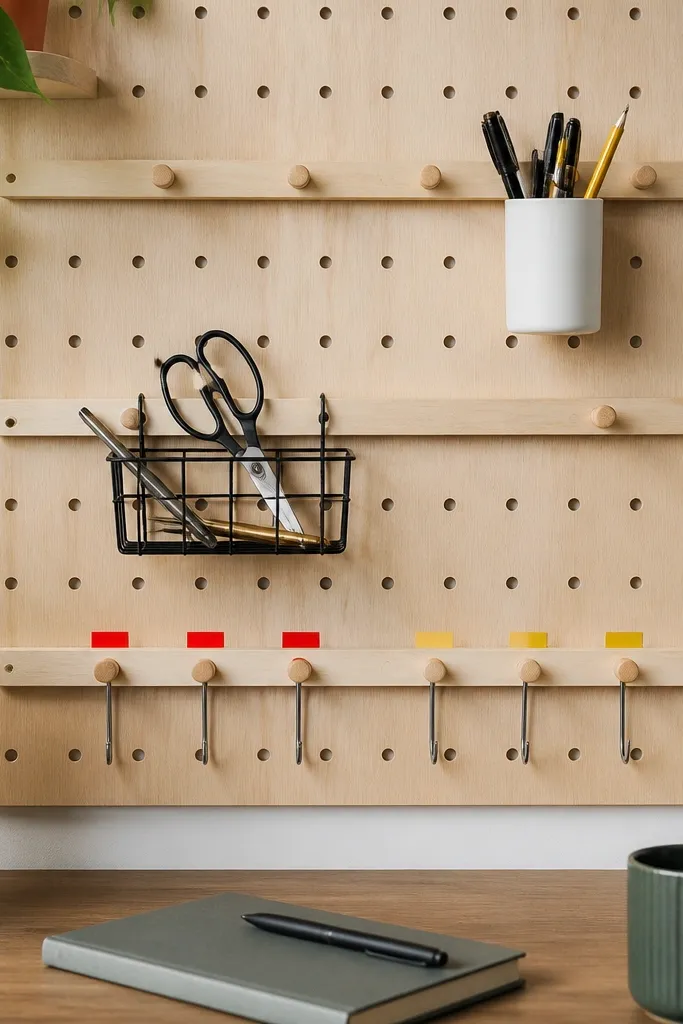
Pegboard is worth it if you want order that grows with your kids. You can move hooks as supplies change, and the desk back stays clean instead of cluttered on the surface. Color-coded hooks make the system kid-proof because they match the label color. I like the look because it turns organization into a visible 'station' instead of hidden bins everywhere.
Mount pegboard so it sits 2-3 inches behind the desk edge. Use small hooks for pens and larger hooks for scissors and headphones. Add two baskets: one for 'grab fast' items and one for 'return here' items. Label with painter's tape and a thick black marker so it wipes and re-does easily.
Pro tipKeep the heaviest items on the center rail - pegboard tips get annoying fast.
AvoidDon't mix random hook sizes; mismatched spacing makes the board look chaotic.
8. Clear Lidded Box for Small Supplies with Picture Labels
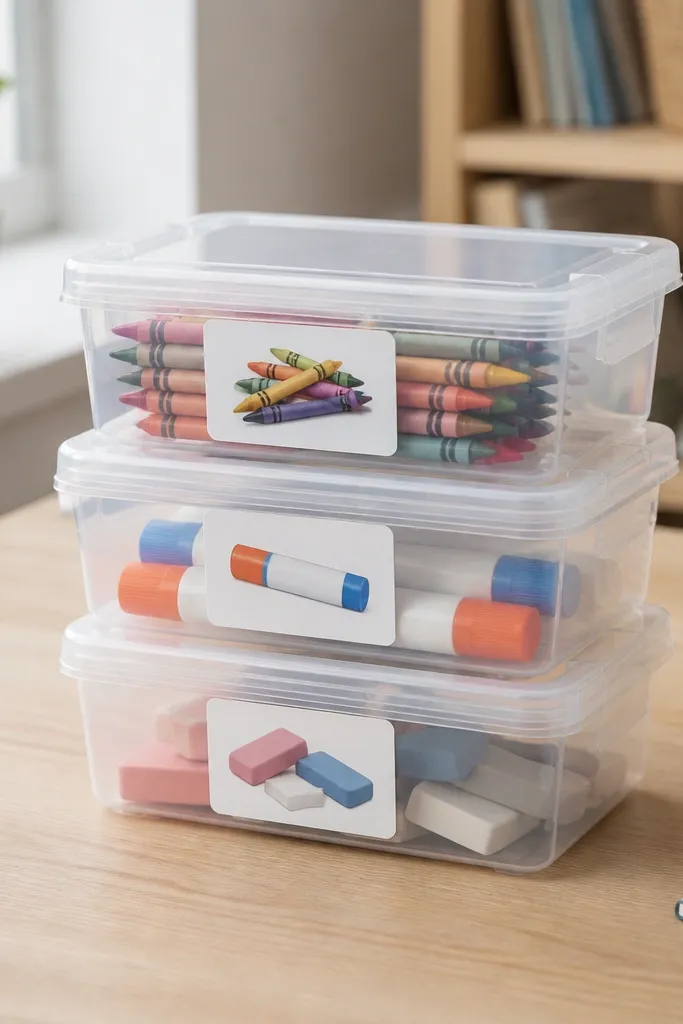
Clear lidded boxes are the best vs worth it desk organization choice when you need both visibility and containment. Kids can see what's inside without opening every box, and lids stop tiny stuff from scattering. Picture labels keep it from becoming a 'ask an adult' system. The setup looks clean because the boxes match and sit in a tight row.
Use boxes about 10x6 inches for desk drawers or a shelf. Print labels with bold icons (crayon, glue stick, eraser) and glue them to the lid with packing tape over the top. Keep only one category per box. Store them at knee-to-torso height so kids can open without climbing.
Pro tipAdd a small strip of shelf liner under the boxes so lids don't slide when the desk gets bumped.
AvoidAvoid unlabeled clear boxes; they look tidy at first and then become mystery clutter.
9. Fabric Pencil Roll Instead of a Pencil Cup
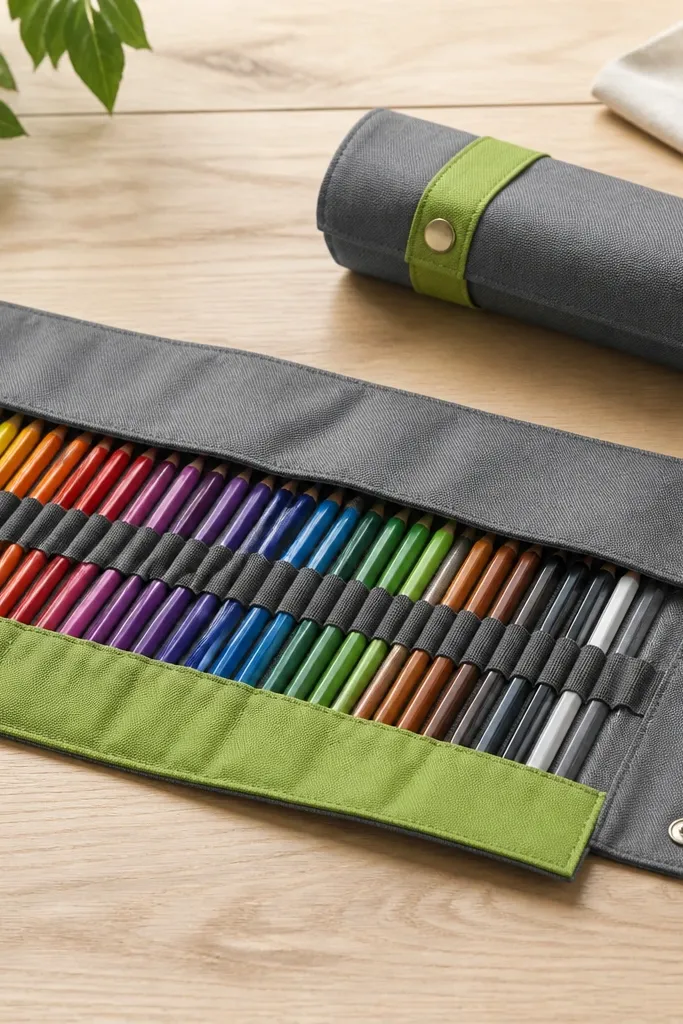
A pencil roll is worth it because it keeps writing tools contained and portable. On a kids desk, cups tip and pencils roll everywhere. The roll also makes it easy to do a quick reset: roll it shut and toss it in a drawer or bin. It looks good because fabric and clean stitching read as intentional, not messy.
Buy a simple fabric roll with elastic loops or sew one from sturdy cotton canvas. Choose a roll with 24 loops so it fits a full set of pencils without crowding. Use a roll size around 16-18 inches long so it lays flat when open. Keep it on the side of the desk where homework starts.
Pro tipRoll it with elastic facing up so kids don't yank loops and stretch them out.
AvoidSkip rolls with flimsy fabric - they flop and look sloppy after a week.
10. DIY Desk Shelf Lip with Scrap Wood and White Felt
This setup is the budget fix for the 'things fall off the desk' problem. A lip creates a physical stop so planners, notebooks, and pencil cases don't slide toward the keyboard. Adding white felt on top keeps items from scratching and makes the shelf feel softer. It also looks clean - a consistent wood lip reads like a custom built-in.
Cut scrap wood into a strip about 1.5 inches tall and the width you need (often 24 inches for a small desk). Sand edges, stain or paint matte white, and screw it into a backer strip so it's solid. Glue felt on the top surface with fabric glue. Mount it 2-3 inches above the desk surface so notebooks sit under it.
Pro tipUse felt in white or light gray so it hides pencil marks better than black.
AvoidDon't mount it too low; if it blocks keyboard access, you'll stop using it.
11. Stackable Drawer Organizer with One "No Dig" Bin
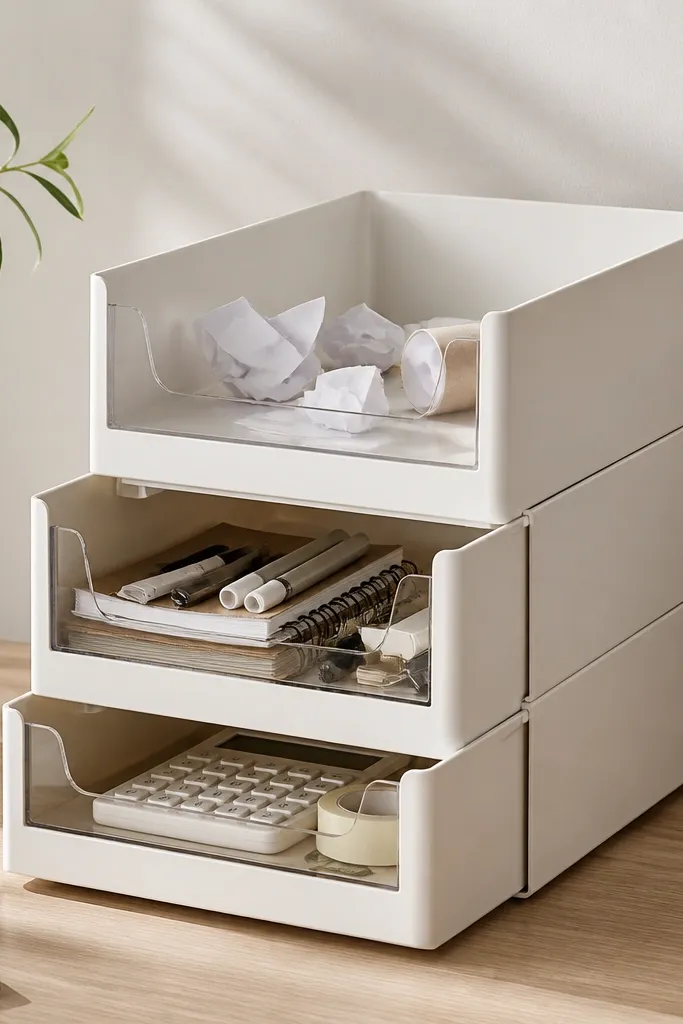
Stackable organizers look tidy, but the real win is the one bin that never requires digging. When kids need to toss broken crayons, wrappers, or random paper, they need a place that accepts mess. That bin keeps the rest of the drawers clean and helps the desk reset fast after homework. It also looks intentional because the top bin is wide and easy to see.
Use stackable organizers with removable bins. Pick one top bin about 3 inches deep and keep it empty except for a small trash liner (like a thin plastic bag). Label it with a big trash icon. For other bins, use narrower compartments for scissors, glue, and erasers.
Pro tipChange the trash liner daily for two weeks - kids learn the habit quickly.
AvoidAvoid putting trash in a narrow bin; it forces kids to shove it and spills happen.
12. Thick Felt Keyboard Tray for "Hot Items"
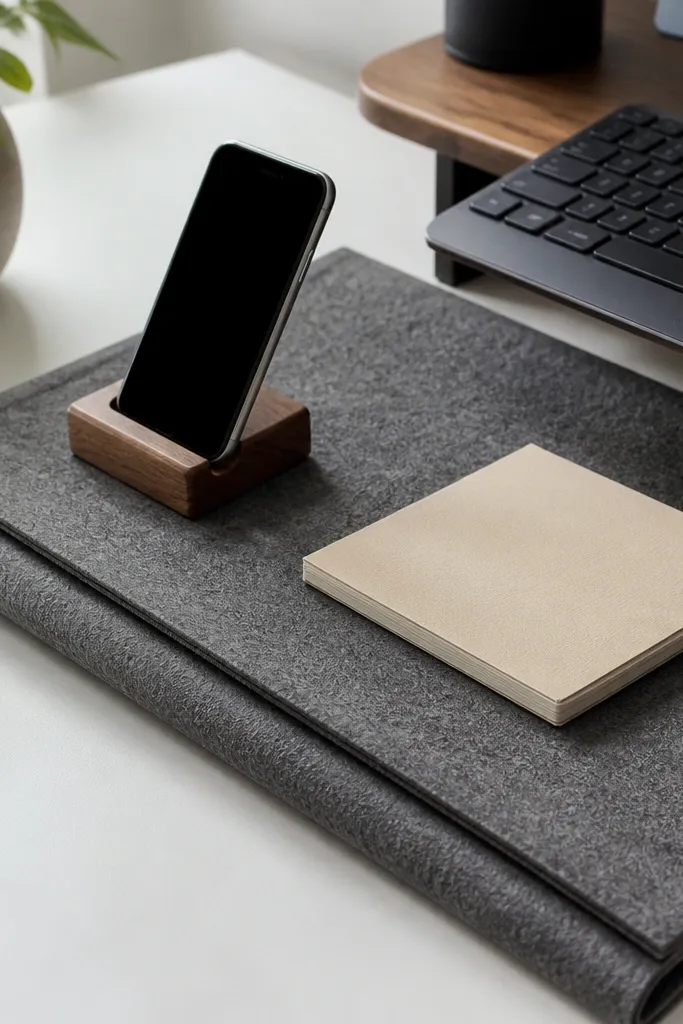
A felt tray makes the desk look soft and controlled. I use it for 'hot items' that move during the day: phone, quick note pad, a small calculator. Felt has friction so items don't slide, and it hides tiny scuffs and dust. It also feels friendlier on a kids desk than hard plastic that rattles.
Cut felt to a rectangle about 18x10 inches depending on your desk. Fold corners slightly to create a shallow lip or stitch the edges so it doesn't fray. Choose thick felt (around 5mm) for stability. Place the tray between keyboard and monitor so it doesn't block cables or the mouse.
Pro tipUse two shades: gray base and a darker felt strip for a 'today' label area.
AvoidSkip thin felt that collapses; it looks like a craft project, not a desk tool.
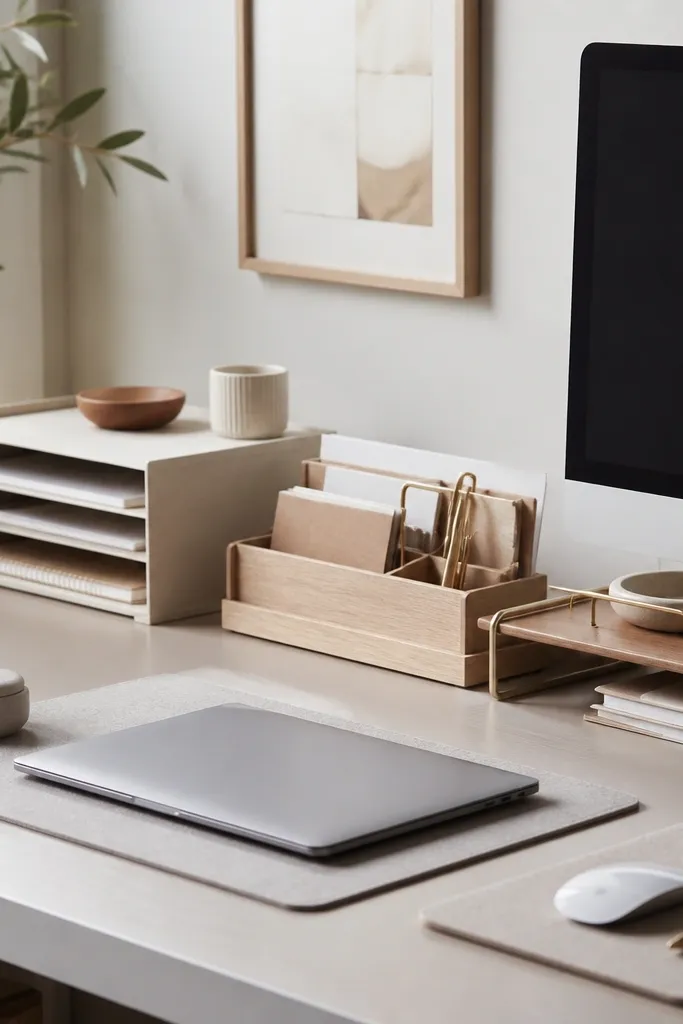
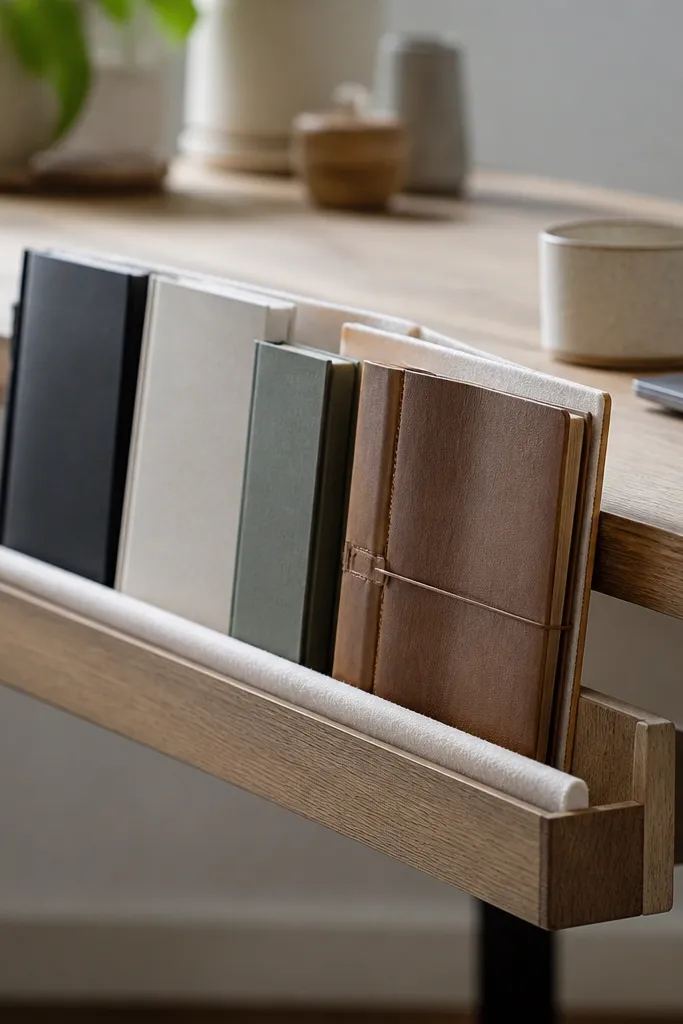
13. Planner-and-Calendar Standing Base with Book Ends
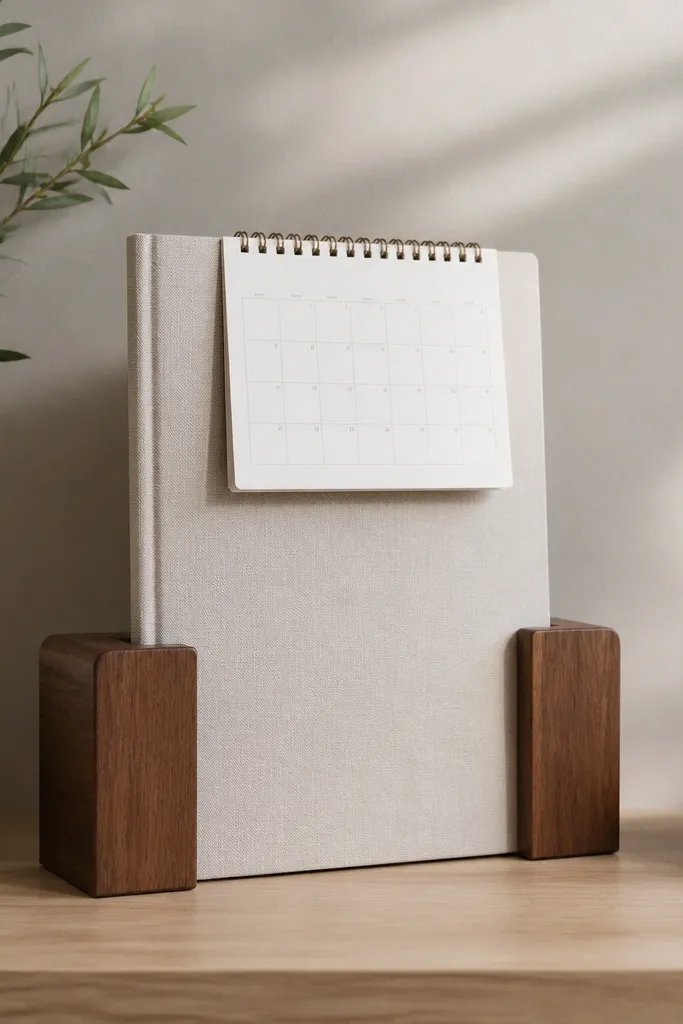
Standing planners keep the desk looking organized even when you're not working on it. Book ends create consistent spacing, so pages don't flop and the calendar stays visible. I like this for kids because it reduces 'where is the assignment?' moments. The visual order also makes it easier for you to check the day without hunting.
Use a thick planner and a small calendar stand or folded frame. Add two book ends or DIY stoppers using scrap wood blocks wrapped in matte contact paper. Set the base so the planner sits 2 inches from the desk edge. Keep one small sticky-note pad clipped at the top.
Pro tipStick a monthly sticker chart on the back of the frame so kids know what month they're in.
AvoidAvoid flimsy stands; if the planner wobbles, kids stop using the system.
14. Paper Sorting Folder System in a Single File Slot
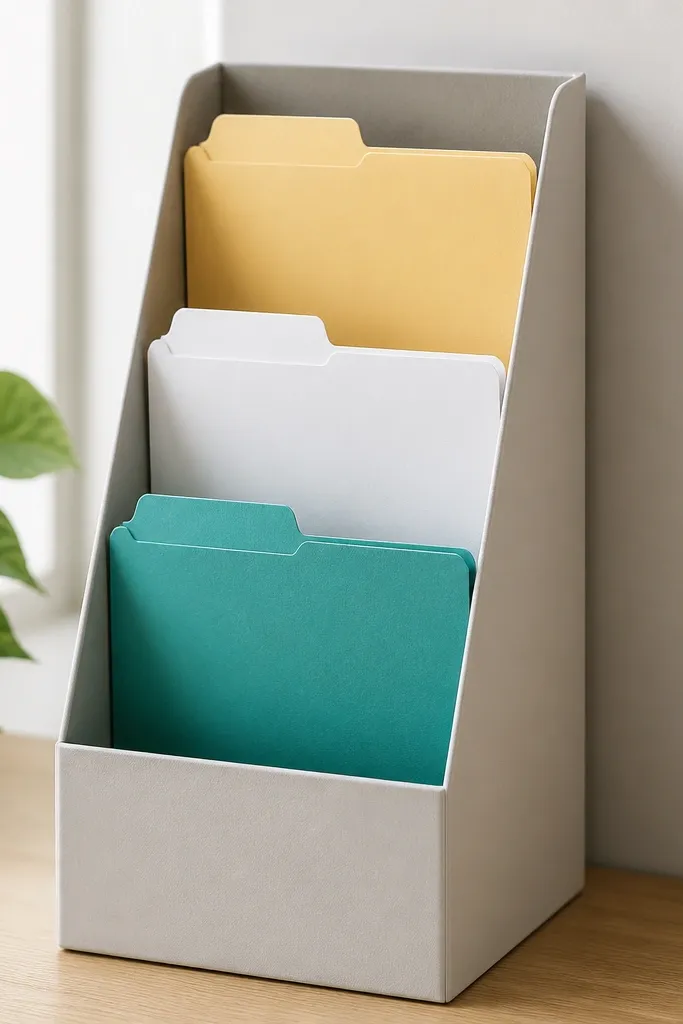
This is worth it when paper keeps multiplying. Instead of stacking loose sheets, you route paper immediately into one of three folders. The colors make it easy for kids to sort without reading every title. Your desk stays clear because there is no fourth option where paper can hide.
Use a single vertical file organizer or even a DIY magazine holder with dividers. Make three folders from cardstock or thin plastic folders cut to the same height. Color-code tabs: yellow for keep, teal for recycle, white for return. Place the sorter near the desk chair so paper gets sorted while it's still in hand.
Pro tipTape a simple 'If it has a due date, put it in Return' rule right on the side.
AvoidSkip open paper trays; they turn into a mixed pile in two days.
15. Corner Shelf for Snacks and Water Bottles with Cup Channels
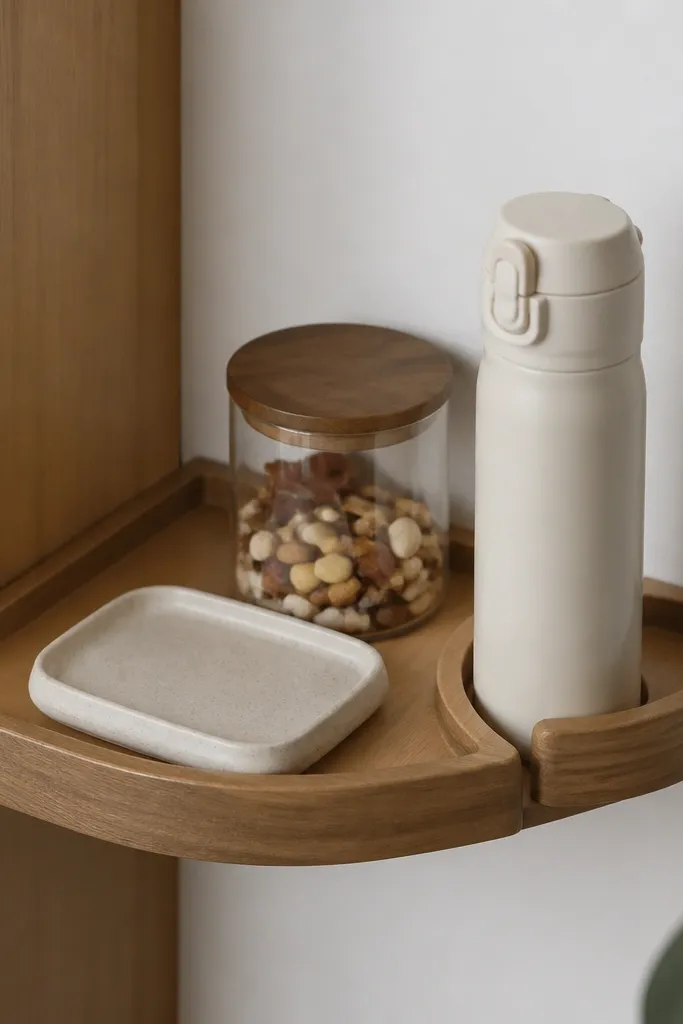
This setup keeps food off the main desk surface, which is the difference between 'organized' and 'sticky chaos.' A corner shelf also uses space people ignore, so your desk stays visually clean. Cup channels stop bottles from rolling into chargers and papers. For kids, having a dedicated snack spot prevents the 'snack on keyboard' habit.
Use a small corner shelf or add two short wall brackets with a board top about 10-12 inches wide. Add a curved foam strip or a DIY channel made from a strip of wood covered in silicone to create bottle grip. Put a lidded snack container and a tray for crumbs. Keep it away from electronics but close enough for quick access.
Pro tipPut a small roll of paper towels on the shelf side so spills get handled immediately.
AvoidAvoid placing snacks next to the pencil bin; crumbs ruin labels and make the desk look dirty.


