1. Cream + Walnut Desk Tray Row
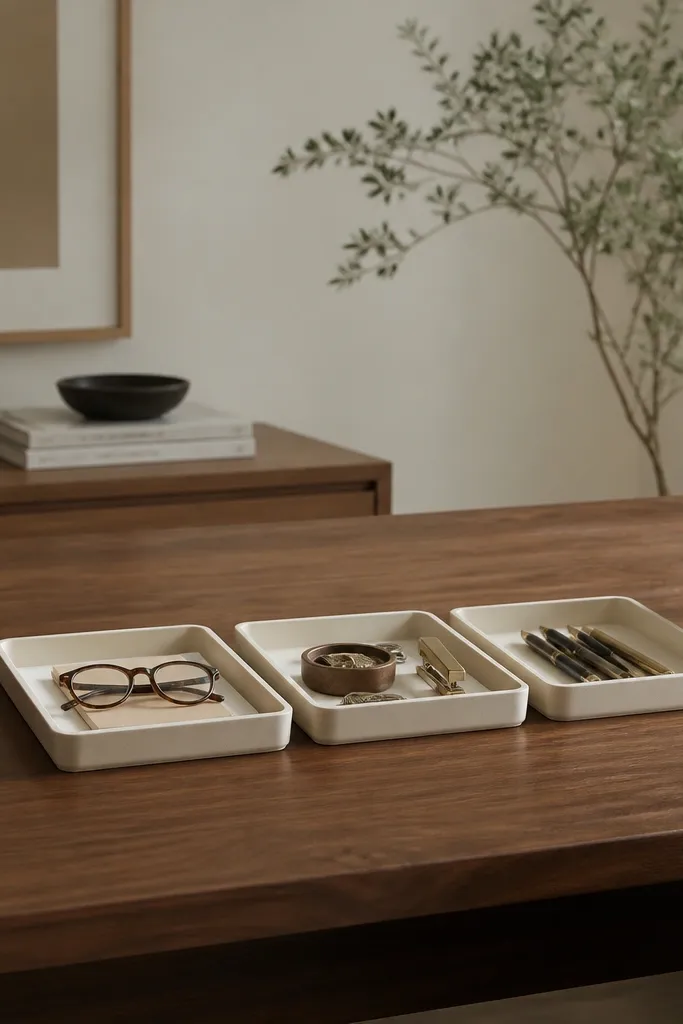
Three matching trays make your desk look designed because your eye reads one clean line instead of scattered items. I like cream because it softens the look and makes dark supplies pop. Walnut pen cups add warmth and keep the palette from feeling sterile. When everything sits inside a tray boundary, the desk stays tidy even when you're busy.
Use trays with straight sides and a matte finish. Aim for trays that are 10-12 inches long each, so the row fits your desk width without gaps. Place a walnut cup at each end and keep the middle tray for daily items like pens and sticky notes.
Pro tipPut the "most touched" items in the center tray so your hands naturally return them there.
AvoidAvoid mixing glossy plastic trays with matte paper organizers - the glossy ones catch light and make everything look cheaper.
2. Brushed Black Cable Dock Under the Monitor
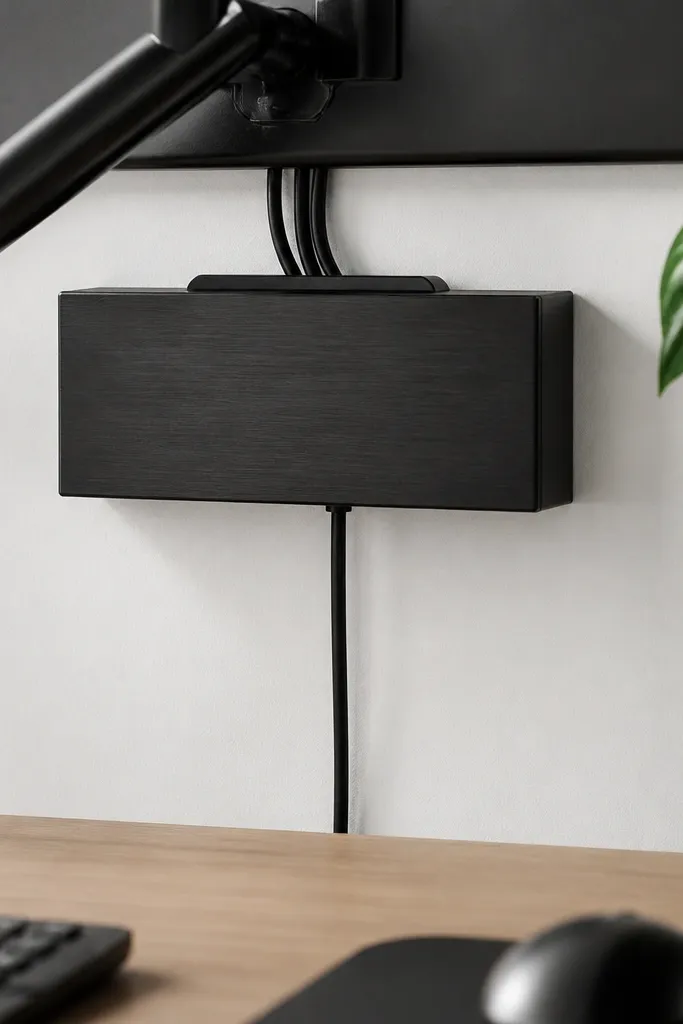
Visible cable chaos kills the expensive look fast. A cable dock hides the slack and keeps cords from drooping across the desk. Brushed black looks clean because it blends with monitor stands and hardware. You get an instant "finished build" effect without changing your desk.
Mount the dock under the monitor using the included screws or strong adhesive pads rated for mounting. Route each cord into the channel and tie the slack with a fabric velcro strap. Keep power bricks off the desktop by placing them inside the dock compartment if it has one.
Pro tipLabel the one cord you actually unplug - write a tiny number on heat-shrink or a label tape strip.
AvoidSkip zip ties on the visible side; they look harsh and can snag kids' fingers.
3. Vertical File Stand for Homework Papers
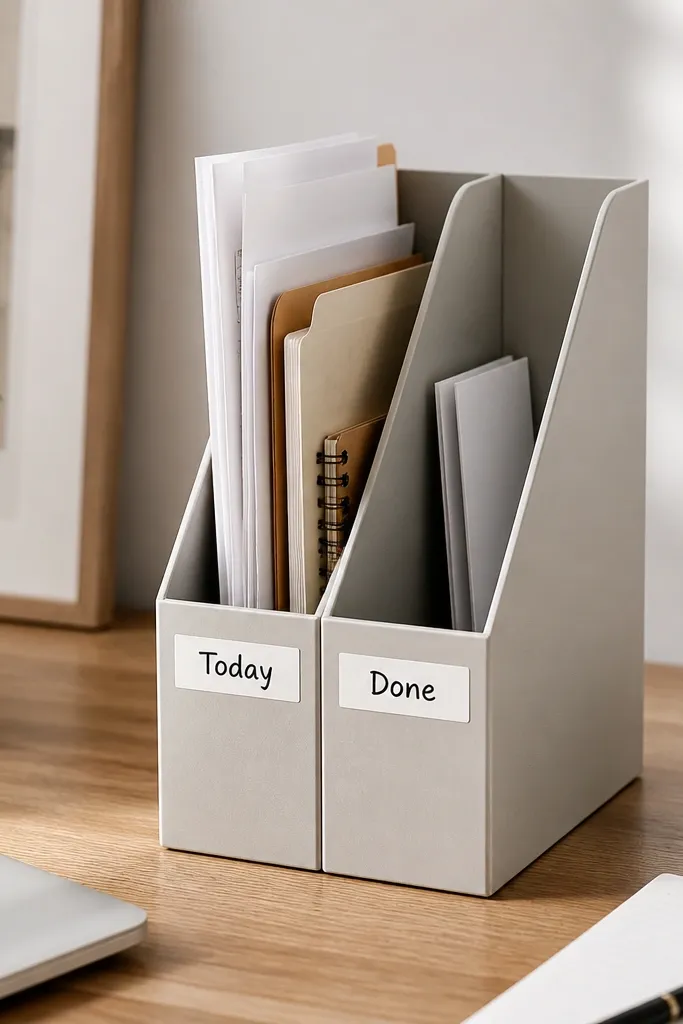
Vertical paper storage stops the "stack avalanche." When kids drop papers flat, they still land inside a slot and stay aligned. The two-slot system also teaches a simple routine without you nagging. The labels make it look intentional, not like a random catch-all.
Use a sturdy acrylic or wood file stand with at least 9-inch slot height. Put "Today" on the left and "Done" on the right so the motion is consistent. Add a strip of white label tape that matches your desk tone.
Pro tipUse a page-size stop at the back (a small binder clip or thin ruler) so papers don't slide out.
AvoidDon't use a flimsy magazine holder; it collapses and papers end up bent.
4. Linen Desk Organizer Pouches for Markers
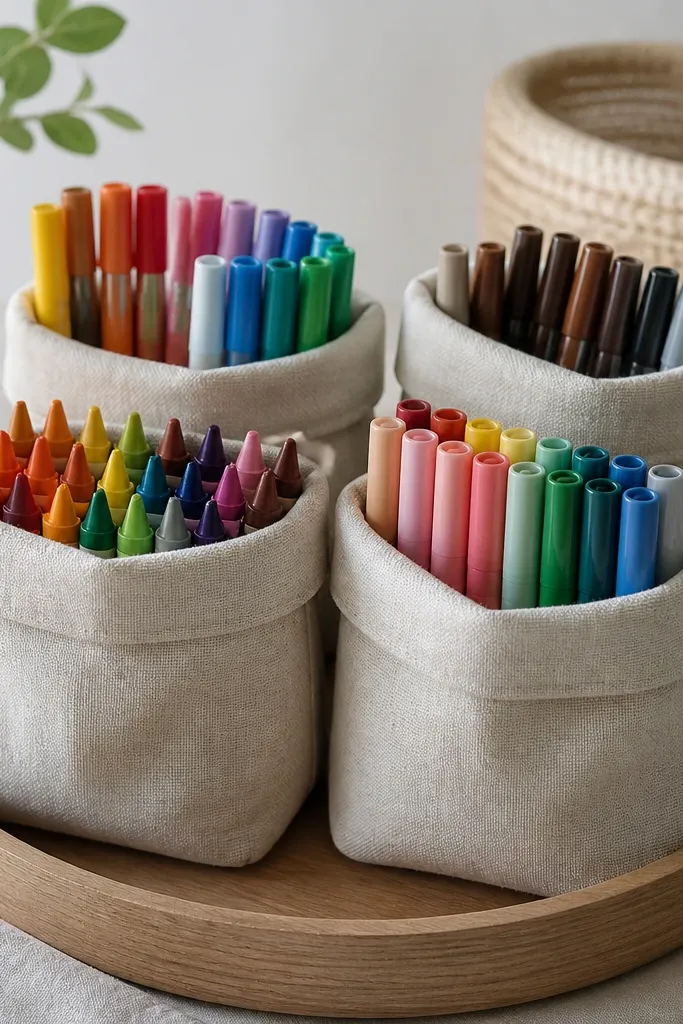
Fabric pouches soften the look and make color tools feel curated. Linen has a matte texture that reads expensive next to glossy plastic. If you keep caps facing up, kids can grab without dumping the whole set. It also hides the messy "marker chaos" when you're not looking.
Choose pouches with a stiff front or insert so they keep their shape. Size them for your marker types: 1-2 inch depth for crayons, 3-4 inch depth for thick markers. Put them inside a larger tray so the pouch edges don't spread across the desk.
Pro tipSew or glue a simple fabric tab label on the pouch front so kids can read it from arm's length.
AvoidAvoid stretchy fabric pouches that sag; they make the whole organizer look tired.
5. White Ceramic Pen Cup + Matching Ruler Slit
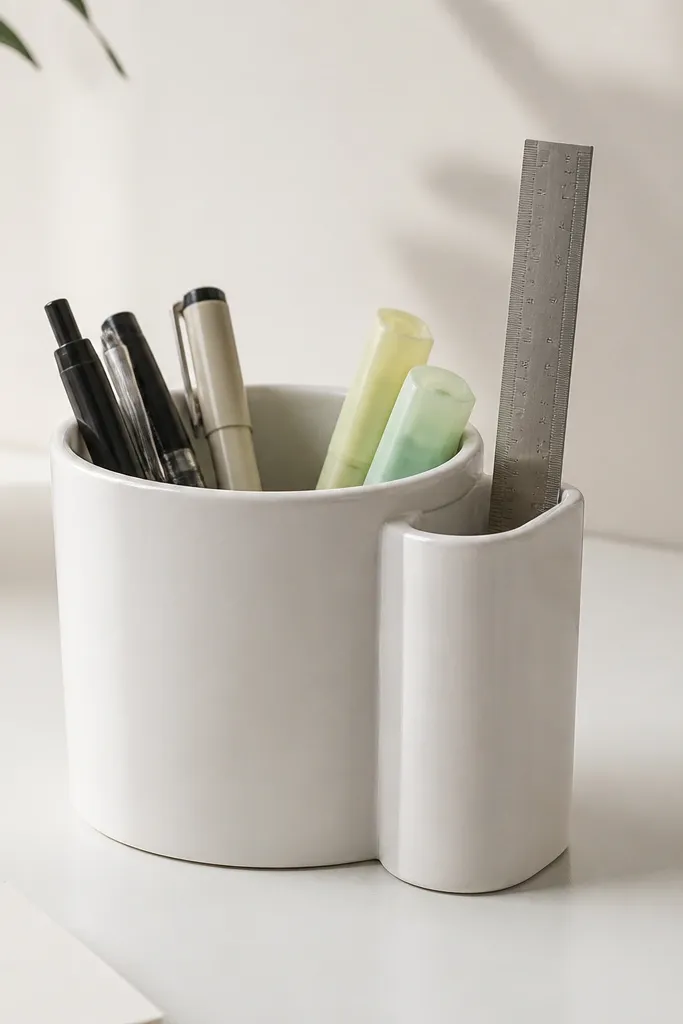
Ceramic looks expensive because it has weight and a smooth matte glaze. Pairing it with a slim ruler pocket keeps your desk from turning into a pile of long items. The ruler pocket also forces rulers to stay visible and straight. Together, they create a neat "tool corner" that stays tidy.
Pick a pen cup about 4 inches wide and 4-5 inches tall. Make a ruler pocket from a thin wood frame or buy a slim organizer insert that holds 12-inch rulers. Match the finish - if the pen cup is matte white, choose a matte wood or white organizer.
Pro tipStore scissors in a separate small cup so they don't wander into the pen cup and scratch.
AvoidDon't mix ceramic with shiny chrome organizers; the contrast makes everything look mismatched.
6. Acrylic Stamp and Sticker Catch-All with Color Labels
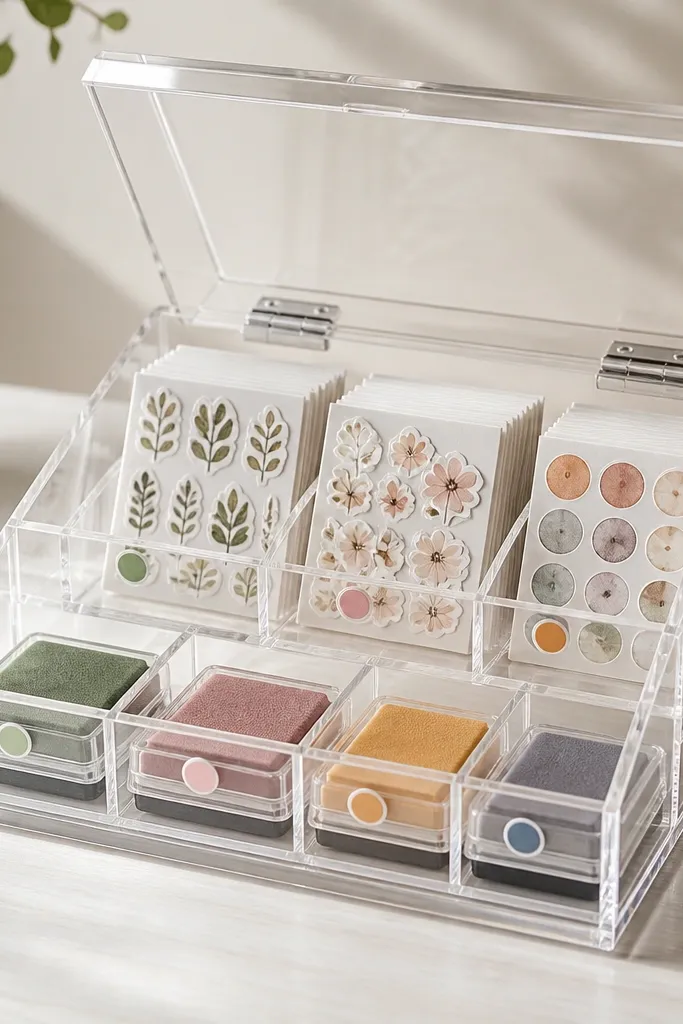
Clear acrylic reads clean in photos because you can see what's inside without opening. Color dots keep it organized without heavy label clutter. This works great for kids because sticker sheets get messy fast, and acrylic keeps them from becoming a paper blob. The lid also keeps dust off school supplies.
Use a box with internal dividers or add a thin acrylic divider panel. Put sticker sheets flat and stamp pads in one side compartment. Label with small dot stickers (not big words) in 3 colors max.
Pro tipAdd a single "restock" label to the inside lid so you remember to refill stamps or tape.
AvoidAvoid frosted acrylic; it hides items and makes you dig around.
7. Oak-Look Contact Paper Desk Backboard with Pegs

A backboard makes the desk feel finished because it gives your eye a background. Oak-look contact paper is cheap but looks real when the grain aligns. Pegs keep daily items off the desktop, so your desk surface stays calm. This is a big aesthetic win with minimal tools.
Cover a thin board (like a scrap of MDF) with oak-look contact paper and trim edges clean. Mount it behind the desk using small screws or adhesive strips. Add two metal pegs about 2 inches apart so headphones don't swing.
Pro tipKeep the peg hardware in one finish - brushed nickel or black.
AvoidSkip crooked board alignment; even a small tilt shows up in pictures.
8. Two-Height Shelf for Books and Clipboard
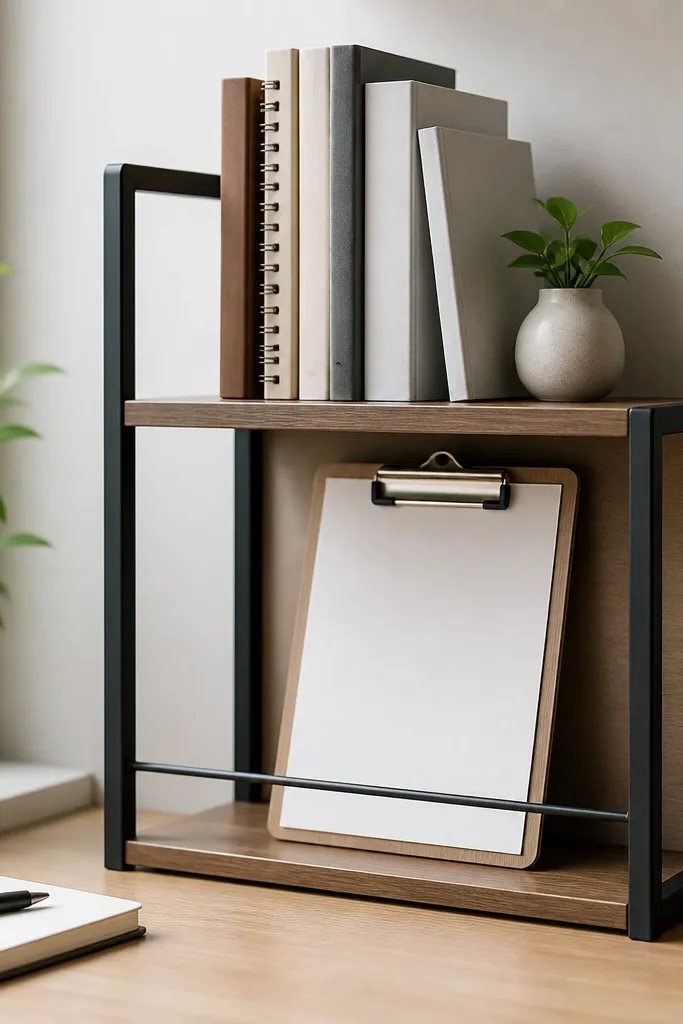
A shelf creates vertical structure and stops books from leaning into mess. The clipboard upright placement makes it easy to grab the next assignment. When books are grouped and angled the same way, the shelf reads styled instead of cluttered. Height differences also make the desk look more layered and expensive.
Use a compact wall shelf or desktop riser with a top and bottom zone. Keep book spines facing out and limit to 6-8 books so the shelf doesn't fill up. Place the clipboard on the lower shelf so it doesn't block the books.
Pro tipAdd a small tray on the shelf edge for bookmarks and tiny erasers.
AvoidDon't stack books horizontally on a shelf - it looks temporary and shifts constantly.
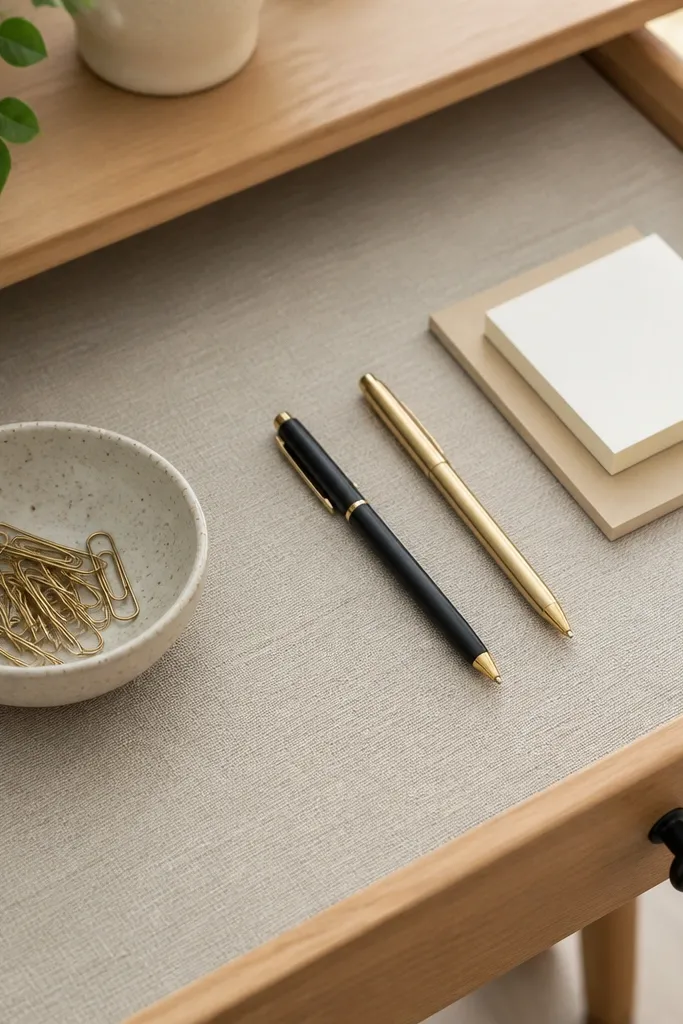
9. Glass-Top Small Tray for Paper Clips and Binder Clips
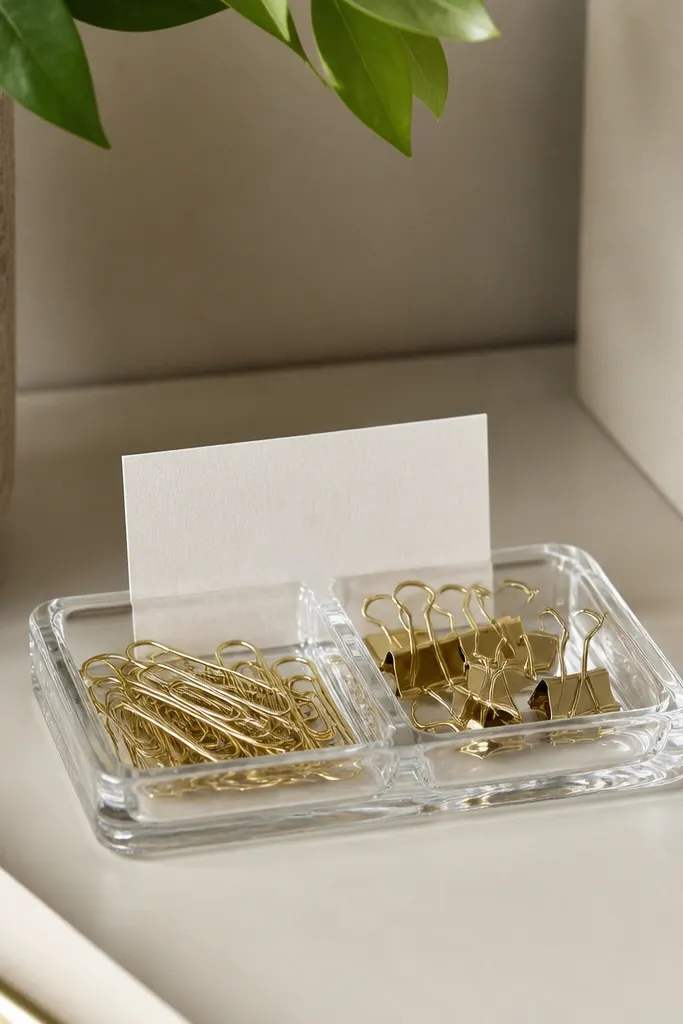
Small metal clips look good when they're organized and visible. A glass tray gives you crisp edges and keeps the clips from mixing with random desk debris. The label card stops the "what bin is this?" problem for kids. It also makes the desk feel designed, because the tray is a deliberate object.
Use a glass tray about 6x9 inches. Sort clips by type and keep them in a thin layer so you can see them. Make labels from cardstock and slip them behind the clips like a mini display card.
Pro tipWipe the glass with a microfiber cloth so fingerprints don't show.
AvoidSkip a deep plastic container; it hides the clips and makes the desk look like storage, not styling.
10. Stackable Drawer System for Kids Supplies
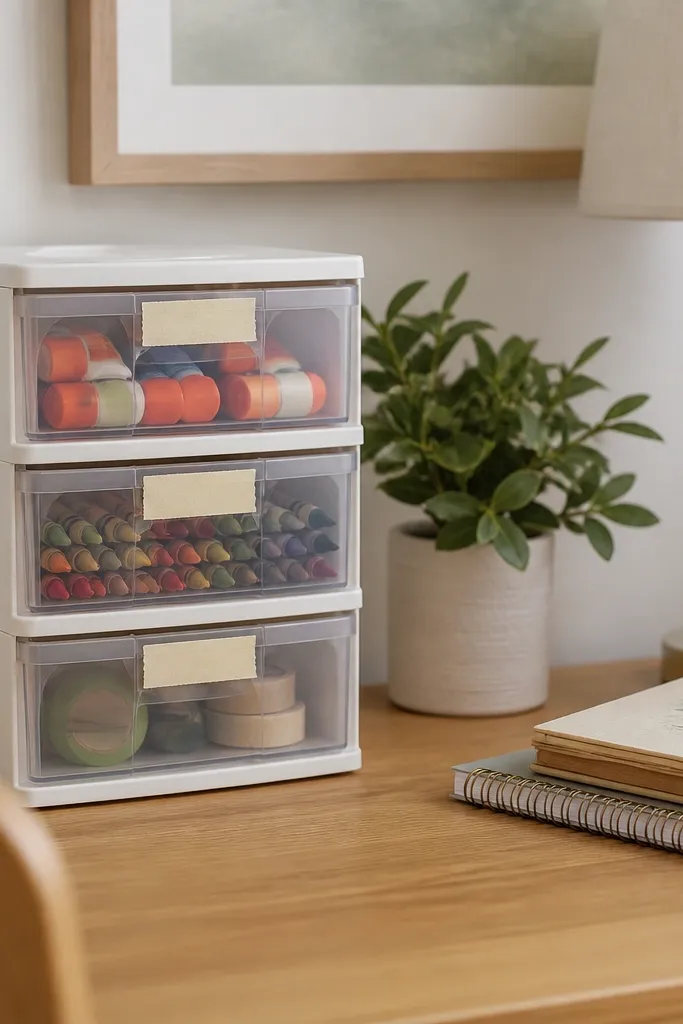
Stackable drawers keep supplies contained and keep the desk surface open. Labels make it easy for kids to return things without asking. When drawers are the same size and aligned, the desk looks uniform. It's also easier to clean because you pull one drawer out instead of digging.
Choose drawers that are at least 8 inches wide so they hold full glue sticks and tape rolls. Use tape labels with simple icons for younger kids. Keep the top drawer for daily use and the bottom drawer for backups.
Pro tipAdd a paper shelf liner inside each drawer so glue drips don't soak into plastic.
AvoidDon't use too many different drawer brands; mismatched fronts look messy.
11. Matte Black Desk Risers for Monitors and Laptops
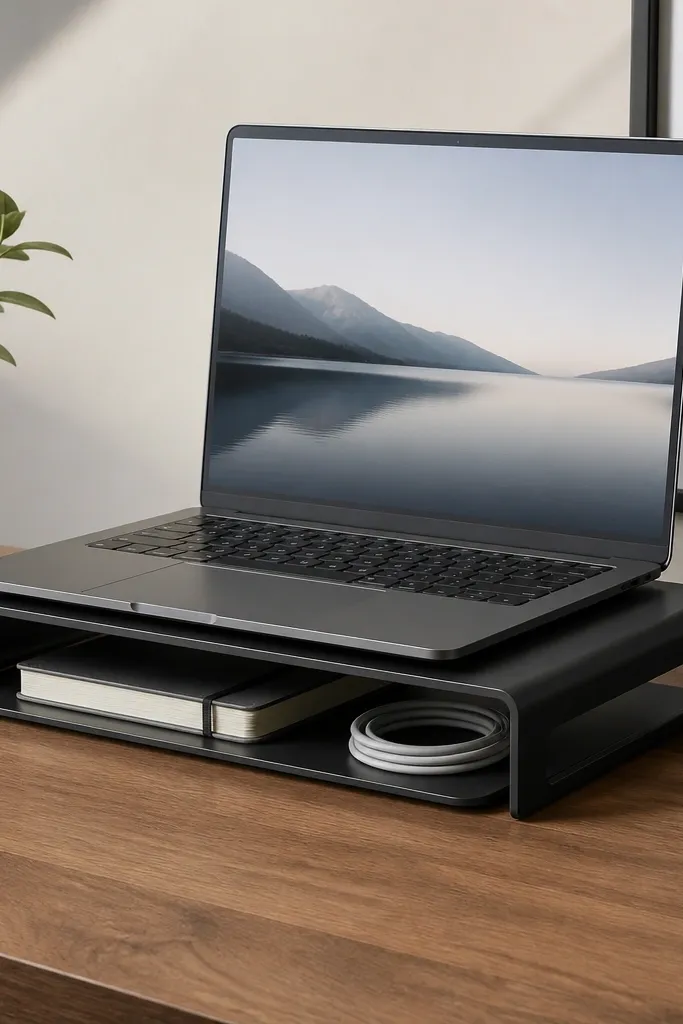
When your laptop sits higher, you create space underneath that you can organize. Matte black risers look clean and make the desk feel intentional. The under-riser tray lets you store chargers and a notebook where your eyes already focus. That layered height reads expensive even with budget accessories.
Use a riser with a flat top and stable base so it doesn't wobble. Add a slim tray under it that fits the riser footprint. Keep items under the riser to 2-3 categories only - power, notes, and one small tool.
Pro tipRoute the charging cable behind the riser so the cord doesn't hang in front.
AvoidSkip risers with open, uneven edges; they make everything underneath look chaotic.
12. Fabric Desk Runner with Hidden Catch Pocket
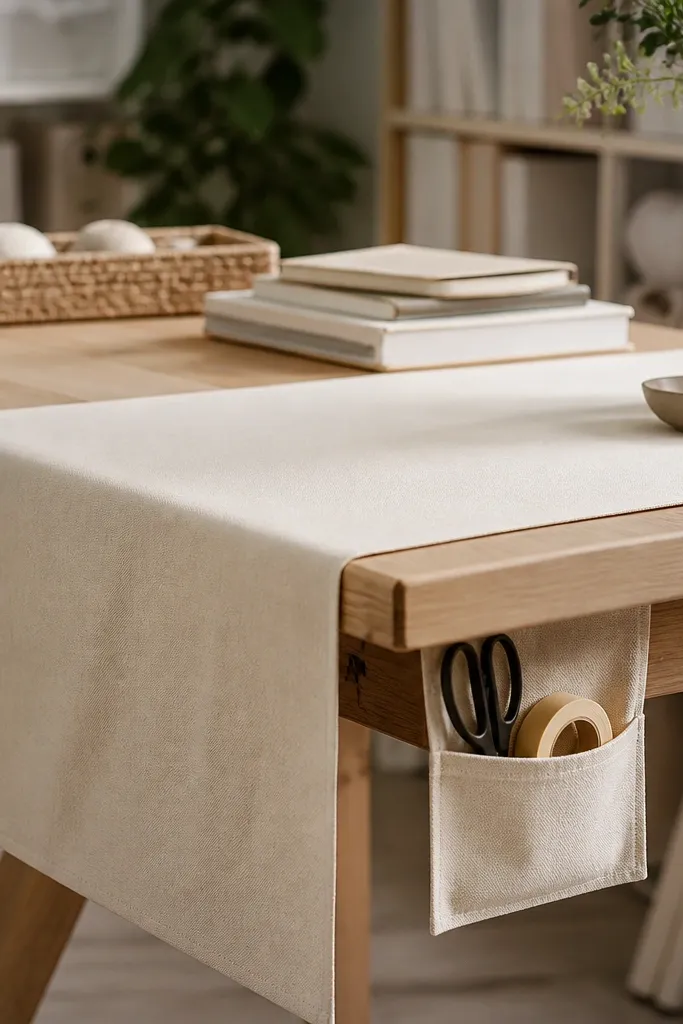
A runner makes the desk look styled because it creates a consistent texture across the surface. The hidden pocket is the practical part - loose items stop rolling around. Cream fabric softens the desk and keeps small bright supplies from looking chaotic. It also helps kids because they always know where the "tools" live.
Use a cotton canvas or linen-blend runner about 14-16 inches deep. Add a side pocket using matching fabric and reinforce the opening with a simple top stitch. Keep scissors and tape in the pocket so they're reachable without opening drawers.
Pro tipWash and dry the runner once before using so it doesn't shrink mid-week.
AvoidAvoid slippery satin fabric; it slides and makes the setup look sloppy.
13. Labelled Mason Jar Set for Q-Tips, Erasers, and Sticky Tabs

Mason jars look handmade and clean when the labels match and the jars sit on a tray. The glass shows contents without mixing them up. I like using painter's tape labels because they peel clean and look neat. This setup feels warm instead of clinical.
Pick jars with the same size so the row looks uniform. Use a tray under them so the lids don't scatter and the jars don't drift. Handwrite labels in black marker and keep the text short - "Erasers," "Tabs," "Q-Tips."
Pro tipAdd a small strip of felt under the jar lids so they don't clink and slide.
AvoidSkip mixed jar sizes; the uneven heights make it look like leftovers.
14. Under-Desk Basket for Backpacks and Extra Folders
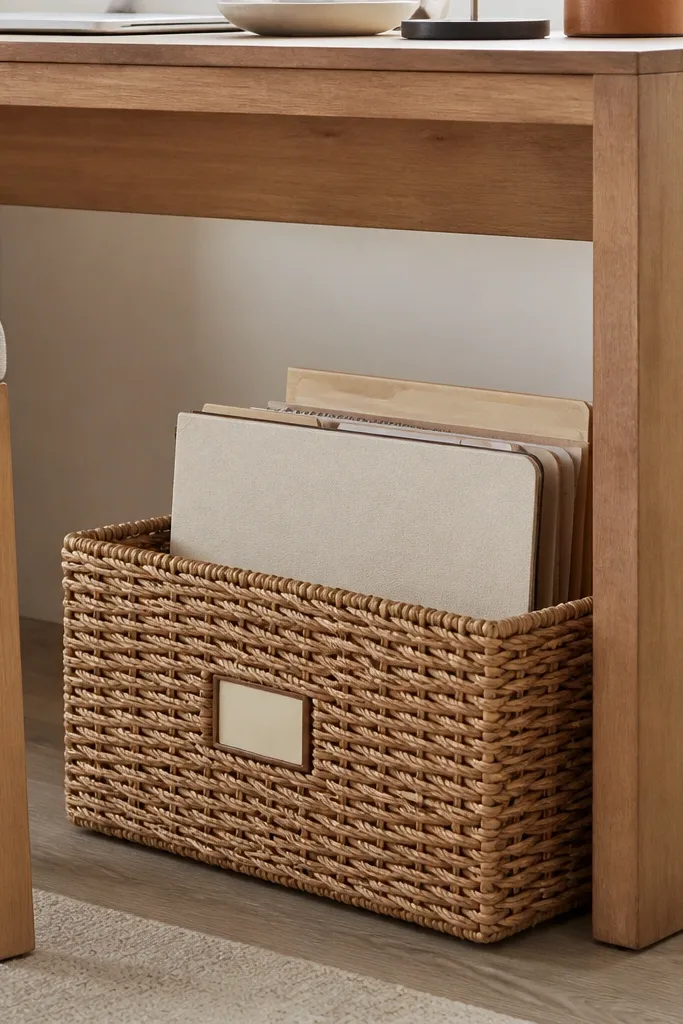
Under-desk storage keeps the desk surface clear, which is the fastest way to get the expensive look. A basket with a divider keeps folders from spilling into the floor mess. Woven texture looks warmer than plastic, especially in kids rooms. The label makes it a system, not a dumping ground.
Use a basket that fits under your desk clearance with at least 2 inches of breathing room. Add a vertical divider board or file folder insert so folders stay upright. Label the front with a simple word and a small icon.
Pro tipKeep the basket for "extras only" so it doesn't fill with random clutter.
AvoidAvoid baskets with loose, fraying edges; they read worn out instead of intentional.
15. Pegboard with Two Color Hooks for Daily Tools

Pegboard gives you clean organization with visible order. Two hook finishes - black and brass - create a designer look without too many colors. Daily tools on hooks mean the desk top stays clear for writing and homework. It's also easy to reconfigure when kids change activities.
Use a pre-cut pegboard panel and mount it at desk height. Space hooks about 3-4 inches apart so items don't overlap. Add one hook for headphones, one for a small brush, and one for a lanyard or key clip.
Pro tipHang heavy items on the bottom row and keep small items higher so they don't swing.
AvoidSkip random hook placement; uneven spacing makes pegboards look cluttered.
16. Gloss-to-Matte Makeover with Shelf Liner for Drawer Tops
A drawer top that's glossy plastic looks cheap fast. Shelf liner gives you a soft matte surface that hides scratches and fingerprints. It also makes small items sit better so they don't slide around. This is one of the easiest ways I've found to upgrade a desk without buying new organizers.
Cut shelf liner to your drawer top size with a clean edge. Choose neutral patterns - taupe dots or solid beige - not loud prints. Place one shallow tray on top for the smallest items and keep the rest in one row.
Pro tipUse a craft knife with a fresh blade for straight cuts.
AvoidAvoid thin liner that bunches; it looks messy within a day.
17. Desk Corner "Station" for Tape, Scissors, and Glue
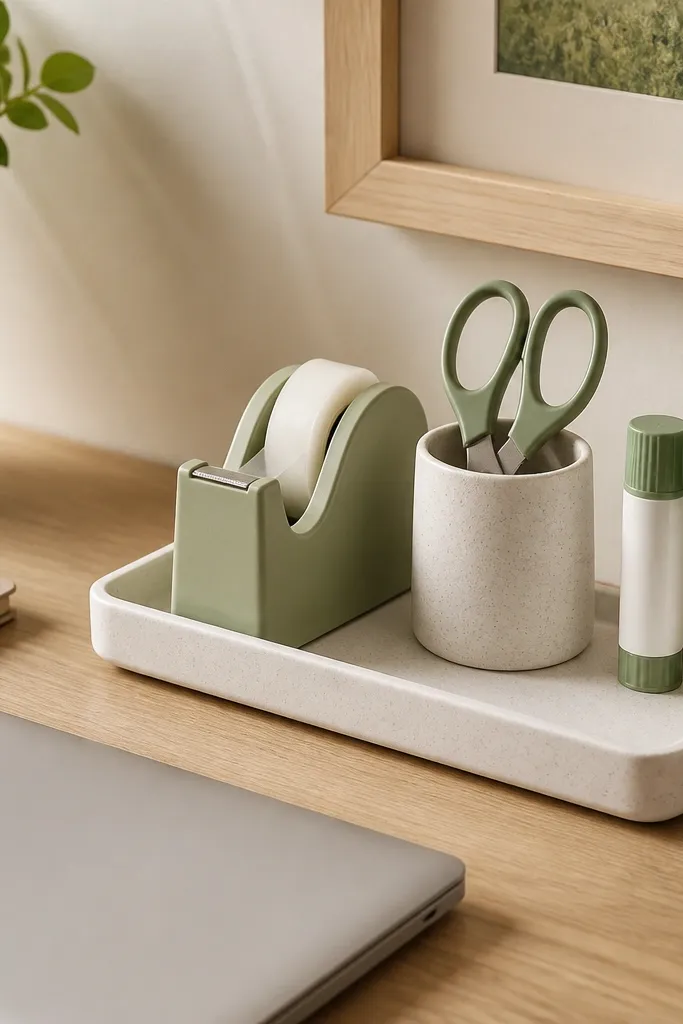
A dedicated corner makes the desk feel intentional because there's a clear job for that space. When tape, scissors, and glue face the same direction, the corner looks neat even when items are in use. This also helps kids because they learn the "tool spot" and return things there automatically. It's a small change that makes the whole desk look more designed.
Use a corner tray or a small rectangular tray turned sideways. Keep glue sticks standing upright and put tape on the side so it doesn't tip. Set scissors in a holder with the blades down and handles up.
Pro tipTape a photo of the station to the underside of the tray so kids can match the layout.
AvoidSkip mixing loose tools in a single cup; it turns into a messy grab pile.
18. Matching Notebooks with Color-Coordinated Elastic Bands
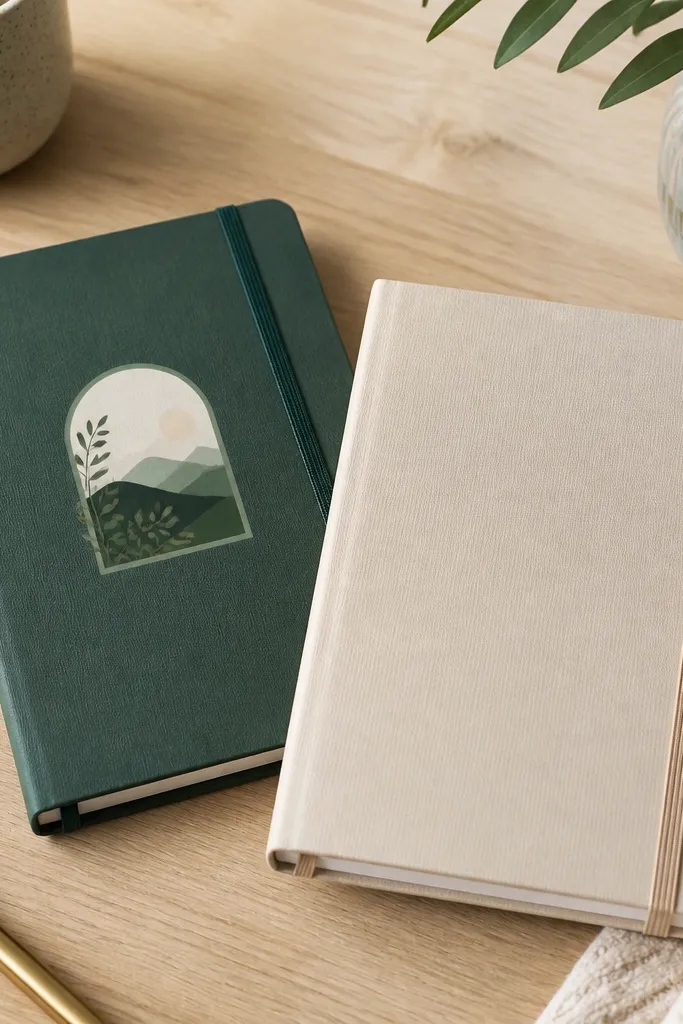
Matching notebooks look expensive because they create a tidy visual block. Elastic bands keep them closed and prevent paper from fanning out. Color-coordinated bands also help kids know which book is for math vs reading. The desk looks styled even when you're mid-week and things are in motion.
Pick notebooks with similar size and cover finish - matte or textured. Add elastic bands in 2 colors only and place a small label sticker on the front. Keep them stacked with spines aligned against a small bookend.
Pro tipUse the same label font style each time so it looks like a system, not random stickers.
AvoidAvoid mixing glossy covers with matte organizers; reflections make the desk look cluttered.
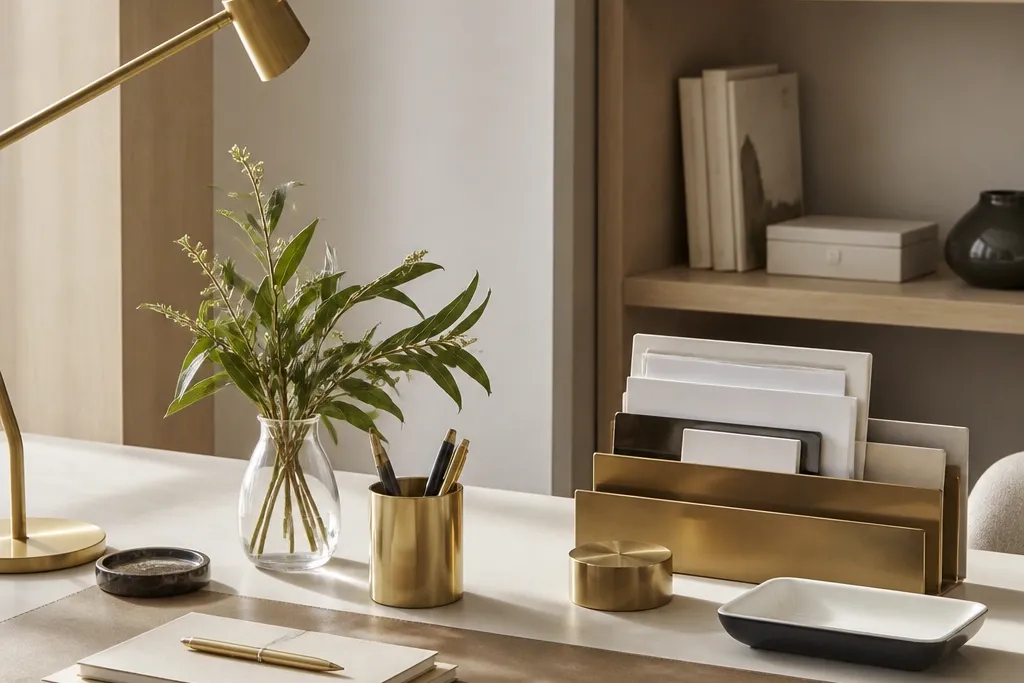
19. Brass-Trim Bookmark and Ruler Display on the Side

Small metal accents make a desk look finished because they catch light in a controlled way. Brass-trim clips are subtle but they add that "designed" feel. The side display keeps rulers and bookmarks from disappearing into drawers. It also makes the desk feel like a workspace, not just storage.
Use a slim wall-mounted strip or desk-edge caddy with brass-trim clips. Clip one ruler and one bookmark so the display stays uncluttered. Choose a warm brass finish that matches your pen cup or hardware.
Pro tipKeep only two items on the display so it stays neat when the week gets busy.
AvoidSkip overcrowding the side display; too many clips make it look like a junk rack.
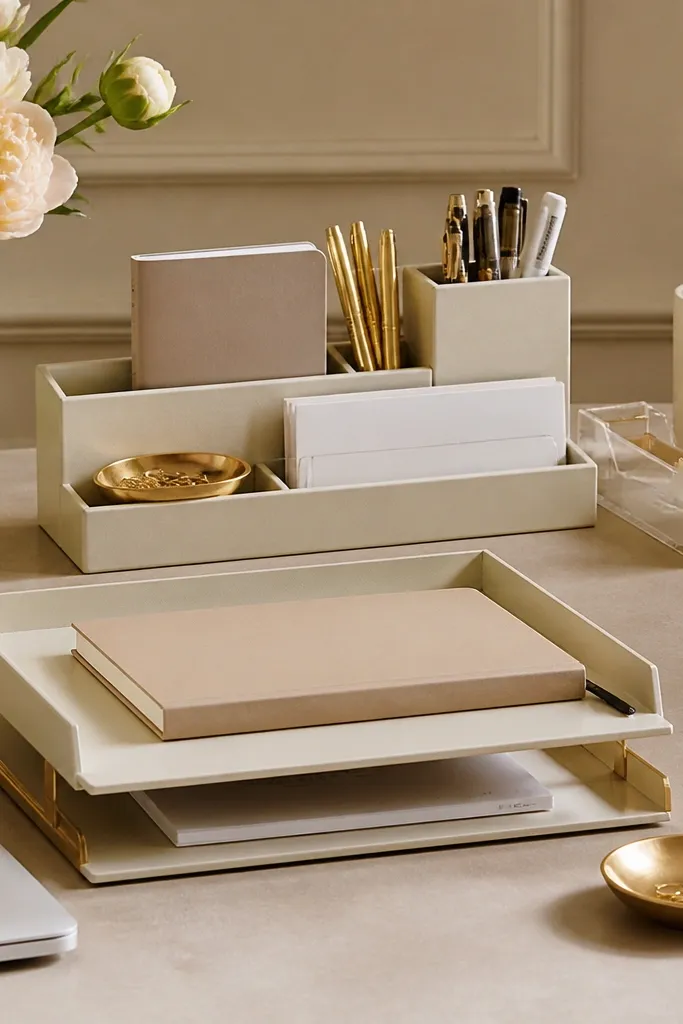
20. Clear Acrylic Desktop Organizer with One Drawer for "Chaos"

This is how you keep the desk looking perfect even when you're not. Clear compartments show what's supposed to be out, and the one drawer hides the stuff you can't place right away. Kids benefit because the drawer has a name and rules. The acrylic keeps the look tidy and modern.
Choose an organizer with multiple top compartments and at least one drawer. Put daily items like pens and highlighters in the open sections and keep the drawer for chargers, spare parts, and small "where does this go?" items. Label the drawer with a white sticker so it reads clean.
Pro tipSet a 10-minute reset rule: if something goes into Chaos, it gets placed properly the next time you sit down.
AvoidAvoid having multiple "chaos" drawers; it defeats the whole point.
21. DIY Washi Tape Color Code for Drawer Contents
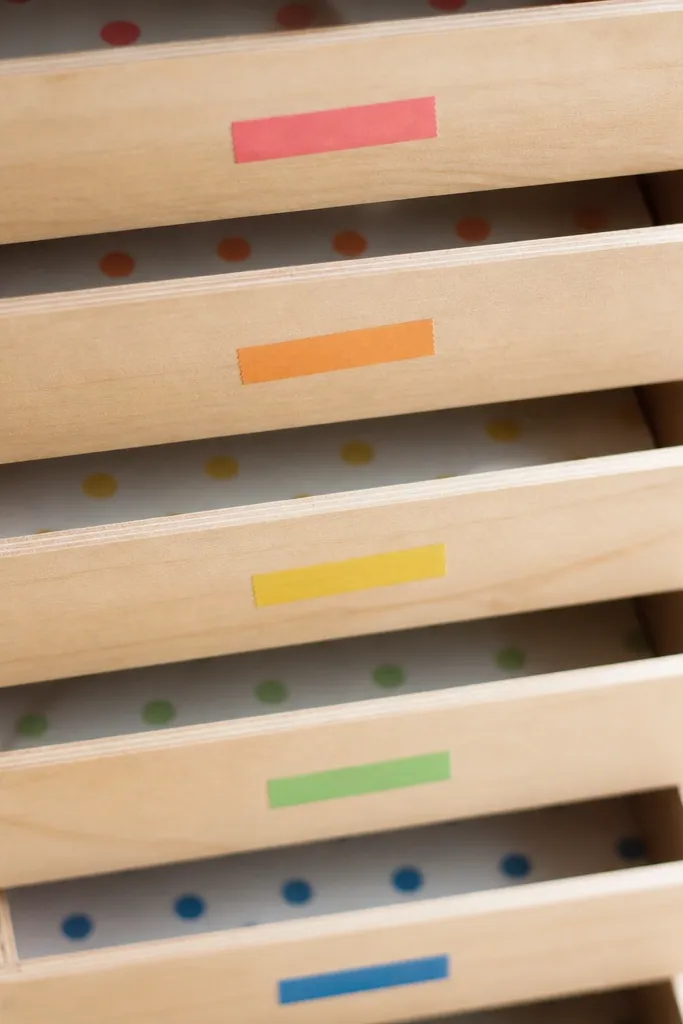
Color coding looks cute and works fast for kids. Washi tape is cheap, easy to replace, and looks clean when you keep it to narrow strips. I use it to label drawer contents without big handwriting that smears. The color system also makes it easier to reorganize when activities change.
Choose 4 colors max and assign each one to a drawer category like writing, art, glue, and paper. Put a narrow washi strip on the drawer front and a matching dot inside on the organizer label. Keep the tape width consistent across drawers.
Pro tipChange the colors at the start of each school term so you can reuse the same bins with a fresh system.
AvoidSkip too many colors; it turns into random decoration instead of organization.
22. Round Wooden Stand for Sticky Notes and Small Pads
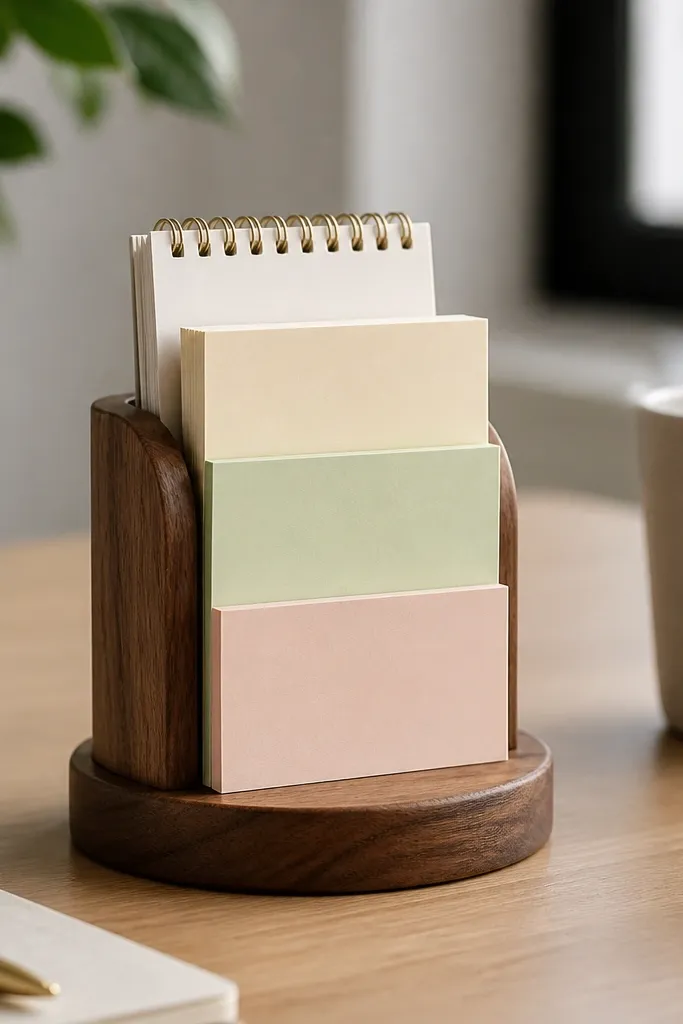
Sticky notes look better when they're upright and contained. A round wooden stand adds warmth and keeps the paper from curling on the desk. It also makes your desk look intentional because the stand creates a focal point. Small notepads tucked behind look tidy and make the area look like a mini writing station.
Use a stand that holds sticky notes upright and has a flat base. Keep sticky notes in one size only so they stack cleanly. Add a small notepad behind the sticky notes so the stand doesn't look empty.
Pro tipPut a pen in the same color family nearby so the station looks coordinated.
AvoidDon't keep sticky notes loose in a drawer; they get bent and look messy fast.
23. Photo-Ledged Wall Shelf for Desk Supplies Backup
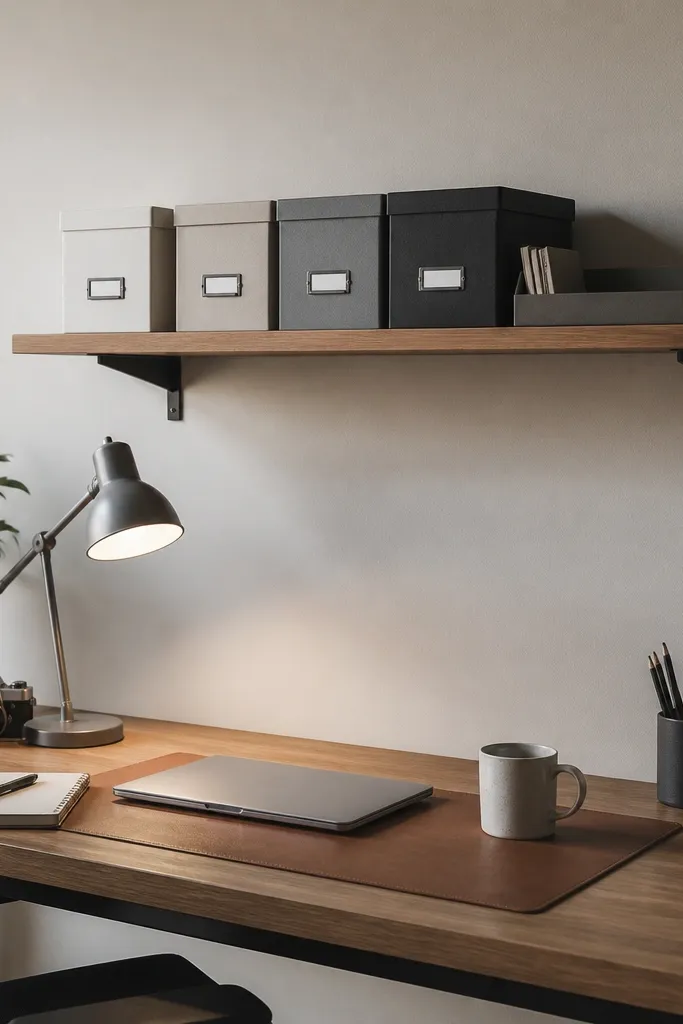
When your backups are off the desk, your desk surface stays calm. A wall shelf with a lip keeps boxes from sliding and makes everything feel like a system. Labeled boxes also prevent the "where did the extra glue go?" problem. This gives a clean look even when kids are actively using supplies.
Mount a small shelf above the desk with a 1-inch lip so boxes stay put. Use two sizes of boxes only and label the front with tape labels. Put the daily backup in an open tray on the shelf so you can restock without digging.
Pro tipKeep backups aligned by size - front edges should line up on the shelf.
AvoidAvoid a shelf with no lip; boxes slide and the shelf looks chaotic.


